Quick start with the contents
Each chapter will have some notes on how to install the software required to follow the examples. Here we explain how to simplify the process by having a working environment with all the dependencies with a few lines of code. Alternatively, with a single click, you can just deploy a ready-to-work virtual machine with Binder.
Execute online (Binder)
For a completely hassle-free experience just follow the link below! Binder will create a virtual machine to automagically serve an executable version of the Jupyter notebook with the exploratory Gaia analysis. It will take a couple of minutes to set up everything.
Binder exploratory Gaia analysis
Execute on your local machine
You need to download the droplets repository from Github and to have a working conda installation. If you don't have a conda environment on your system, this will create a temporary conda installation called my_conda_env in the droplets directory. This will not interfere with any installation on your system, and removing it is as simple as deleting the my_conda_env directory. More information at miniconda
On Linux:
# 1. Download droplets repository contents from Github
git clone https://github.com/spsrc/droplets.git
cd droplets
# 2. Prepare a local installation of conda (if curl -O does not work, try wget)
curl -O https://repo.anaconda.com/miniconda/Miniconda3-latest-Linux-x86_64.sh
bash ./Miniconda3-latest-Linux-x86_64.sh
rm ./Miniconda3-latest-Linux-x86_64.sh
# 3. Make conda available by openning a new terminal
conda env create -f environment.yml
conda activate droplets
jupyter notebook
On MacOS:
Here are the steps for MacOS. The only difference is the Miniconda version to download.
# 1. Download droplets repository contents from Github
git clone https://github.com/spsrc/droplets.git
cd droplets
# 2. Prepare a local installation of conda (if curl -O does not work, try wget).
curl -O https://repo.anaconda.com/miniconda/Miniconda3-latest-MacOSX-x86_64.sh
bash ./Miniconda3-latest-MacOSX-x86_64.sh
rm ./Miniconda3-latest-MacOSX-x86_64.sh
# 3. Make conda available by openning a new terminal
You can skip steps 2 and 3 if you already have conda available. Now that you have everything needed, you can create a conda environment with the dependencies:
conda env create -f environment.yml
conda activate droplets
jupyter notebook
Alternative to miniconda, use mambaconda
This uses mamba as a dependency solver, which is much faster than plain conda, and sets the default channels to the community-developed conda-forge. More info in miniforge:
curl -L -O "https://github.com/conda-forge/miniforge/releases/latest/download/Mambaforge-$(uname)-$(uname -m).sh"
bash Mambaforge-$(uname)-$(uname -m).sh
Uninstall
In case you want to remove all the conda-related installation, please follow this information.
Navigate through the Jupyter notebook:
Now navigate to the gaia_exploratory folder
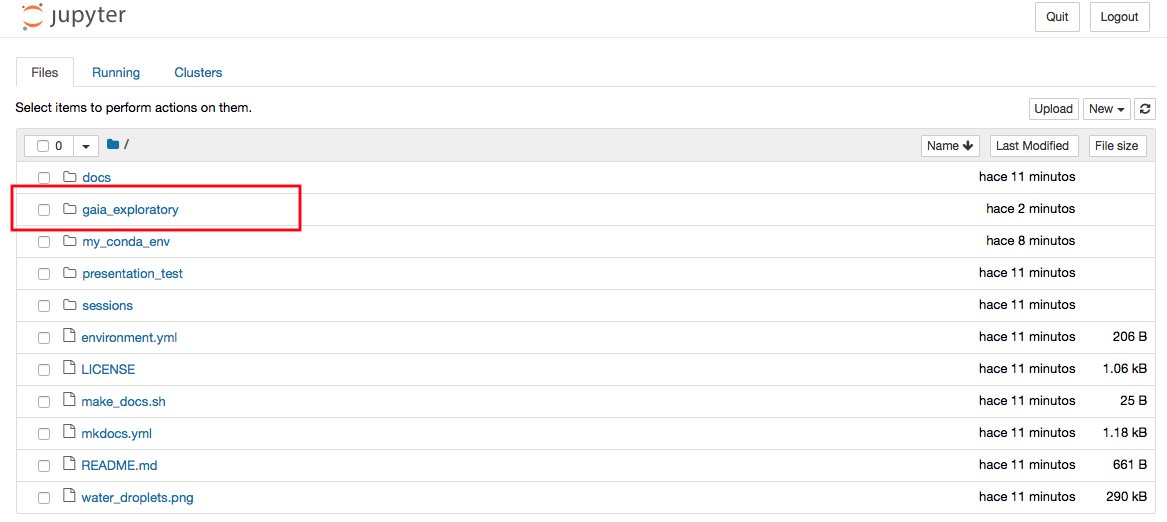 and open the exploratory Gaia analysis
jupyter_exploratory.ipynb

Coming back in the future
If you want to come back and continue an analysis at a later time you don't need to repeat all the installation steps. Just go to the droplets folder and run:
source my_conda_env/etc/profile.d/conda.sh
conda activate droplets
Take down
If you want to remove everything related to the installations above, simply remove the droplets directory, which also contains the local conda installation and all the dependencies.
rm -r droplets
In case you were working with your own conda installation, you can delete the environment with:
conda env remove -n droplets